
8 Power Supply Solutions for ZERO BREEZE Mark 3 Portable AC

We often get questions like:
"Can I use a 12V battery to run the Mark 3?"
"How long will the Mark 3 last on a full battery?"
We get it. Powering your Mark 3 properly is key to getting the best cooling performance, whether you're camping off-grid or working in the field.
In this guide, we'll walk you through 8 different ways to power your Mark 3, starting with the easiest one: the Mark 3 Battery.
Powering Mark 3 AC Through Mark 3 Battery
The Mark 3 AC is designed to run on 48V DC power. That's exactly what the Mark 3 Battery provides, making them a perfect match. Here are the key specs for both the Mark 3 AC and the battery:
-
Mark 3 AC:
- Rated Working Voltage: 48V
- Working Voltage Range: 38V-58.5V
-
Mark 3 Battery:
- Capacity: 1022Wh
- Output Voltage: 42V-58.8V
- DC Charge Input Voltage: 12V-60V
- Charging Limited Current: 10A
- Pass-Through Charging: Yes
1. Mark 3 Batteries
Option A: One Mark 3 Battery
What you need:
- 1 × Mark 3 AC
- 1 × Mark 3 Battery
How to connect:
Use the attached power cable on the Mark 3 Battery to connect directly to the Mark 3 AC.

What to expect:
With a single 1022Wh battery, you can estimate the runtime using this formula:
Runtime = Battery Capacity / Power Consumption
Here are the approximate runtimes for each mode:
|
Mode
|
Power Consumption (W)
|
Estimated Runtime (hrs)
|
|
Rocket
|
350–500
|
2–3
|
|
Cool
|
200–350
|
3–5
|
|
Sleep
|
150–200
|
5–7
|
|
Fan
|
12–17
|
60–85
|
|
Dry
|
350–500
|
2–3
|
|
Care
|
150–350
|
3–7
|
|
Heat
|
200–500
|
2–5
|
Note:
• Actual runtime may vary depending on environmental temperature, humidity, mode, and setup.
• For more flexible placement, use a Mark 3 Power Extension Cable to position the battery and AC unit separately.
Option B: Two Mark 3 Batteries
What you need:
- 1 × Mark 3 AC
- 2 × Mark 3 Batteries
How to connect:
- Use the power cable attached to Battery B to connect it to Battery A.
- Use the power cable attached to Battery A to connect to the Mark 3 AC.

What to expect:
The batteries are connected together, doubling the total capacity to 2044Wh. Runtime effectively doubles:
|
Mode
|
Power Consumption (W)
|
Estimated Runtime (hrs)
|
|
Rocket
|
350–500
|
4–6
|
|
Cool
|
200–350
|
6–10
|
|
Sleep
|
150–200
|
10–14
|
|
Fan
|
12–17
|
120–170
|
|
Dry
|
350–500
|
4–6
|
|
Care
|
150–350
|
6–14
|
|
Heat
|
200–500
|
4–10
|
Note:
• When the first battery is depleted, the second one automatically takes over with no interruption in power.
Option C: Three to Four Mark 3 Batteries (Stacked for Extended Runtime)
What you need:
- 1 × Mark 3 AC
- 3 to 4 × Mark 3 Batteries
How to connect:
- Connect the batteries one by one using their attached power cables. Each battery links to the next, forming a chain.
- Use the remaining available power cable to connect directly to the Mark 3 AC.

What to expect:
The batteries create a stackable system where adding more batteries extends the runtime. The Mark 3 AC will draw power from each battery in sequence, switching automatically without interruption.
For example, with 3 batteries, you can run the Mark 3 on sleep mode for several nights in a row, perfect for extended outdoor stays.
2. Mark 3 Battery with Mark 3 Power Adapter (Pass-Through Charging)
What you need:
- 1 × Mark 3 AC
- 1 × Mark 3 Battery
- 1 × Mark 3 Power Adapter
How to connect:
- Use the attached power cable on the battery to connect to the Mark 3 AC.
- Plug the power adapter into the battery.
- Connect the adapter to a wall socket.

What to expect:
This setup enables pass-through charging, meaning the power adapter charges the battery while the battery powers the Mark 3 AC simultaneously. As long as there is an external power supply, the battery remains charged and the AC runs without interruption. If AC power is lost, the battery will continue to power the Mark 3 AC, so you can enjoy continuous cooling.
3. Mark 3 Battery with Car Cigarette Lighter (Pass-Through Charging)
What you need:
- 1 × Mark 3 AC
- 1 × Mark 3 Battery
- 1 × Cigarette Lighter Charging Cable (compatible with Mark 3 Battery)
How to connect:
- Use the attached power cable on the battery to connect to the Mark 3 AC.
- Plug the charging cable into the battery.
- Plug the other end into the car's 12V cigarette lighter port.

What to expect:
This method takes advantage of the Mark 3 Battery's pass-through charging feature: the car's cigarette lighter charges the battery while the battery powers the AC. However, most 12V cigarette lighter ports provide only around 120W, while the Mark 3 AC requires at least 150W to operate. Therefore, the cigarette lighter cannot power the AC alone if the battery is fully drained, but it can extend runtime during use.
For example, with a fully charged battery, this setup can power the Mark 3 AC for approximately 2.7 hours at maximum setting.
If you're not in a rush to use the AC, you can charge the battery slowly via the car port while driving or waiting, making it a convenient power prep option for road trips and outdoor activities.
Note:
• The car's cigarette lighter port should supply a stable current of at least 10A for optimal charging of the Mark 3 battery. If the current is lower, charging speed will decrease accordingly. The battery limits the charging current to 10A to protect itself.
4. Mark 3 Battery with Solar Panels (Pass-Through Charging)
Charging with solar panels is a great option for off-grid use. Here we use ZERO BREEZE 100W solar panels as an example to illustrate the setup where the solar panel charges the Mark 3 battery while the battery powers the Mark 3 AC via pass-through charging.
Option A: Two 100W Solar Panels
What you need:
- 1 × Mark 3 AC
- 1 × Mark 3 Battery
- 2 × 24V 100W Solar Panels
- 1 × Solar Charging Cable
How to connect:
- Connect the two solar panels in series.
- Plug the series output into the solar charging cable.
- Connect the cable to the battery.
- Use the attached power cable on the battery to connect to the Mark 3 AC.

What to expect:
This setup delivers around 200W at 48V, allowing the solar panels to charge the battery while the battery powers the Mark 3 AC.
However, since the AC requires at least 150W to operate, solar power alone is not stable or strong enough to run the unit if the battery is completely empty. Sudden drops in sunlight may also cause temporary power interruptions.
If the battery is fully charged, solar input can significantly extend the runtime by 30%–50%, depending on sunlight conditions and usage mode. For example, in Rocket mode (500W), this setup can extend the runtime to around 3–4 hours under strong sunlight, compared to 2–3 hours on battery alone.
Option B: Four 100W Solar Panels
What you need:
- 1 × Mark 3 AC
- 1 × Mark 3 Battery
- 4 × 24V 100W Solar Panels
- 1 × Solar Charging Cable
- 2 × MC4 Y Connectors
How to connect:
- Connect two panels in series to form one string. Repeat for the other two panels.
- Connect the two strings in parallel using the Y connectors.
- Plug the combined output into the solar charging cable.
- Connect the cable to the battery.
- Use the attached power cable on the battery to connect to the Mark 3 AC.

What to expect:
This setup provides around 400W at 48V under full sunlight, so the battery can power the Mark 3 AC while being charged by the solar panels.
Thanks to the higher solar input, it can support most AC modes, even under moderate to heavy use. However, in Rocket mode at full 500W, the system still relies partly on the battery to cover the power gap, especially when sunlight fluctuates.
For example, in Rocket mode (500W), this setup can extend the runtime to approximately 5–6 hours, compared to 2–3 hours on battery alone. In lighter modes like Sleep, you may even achieve continuous operation for most of the day, depending on sunlight availability.
Option C: Six 100W Solar Panels
What you need:
- 1 × Mark 3 AC
- 1 × Mark 3 Battery
- 6 × 24V 100W Solar Panels
- 1 × Solar Charging Cable
- 2 × MC4 Y Connectors
How to connect:
- Connect three panels in series to form one string. Repeat to create a second string.
- Connect the two strings in parallel using the Y connectors.
- Plug the combined output into the solar charging cable.
- Connect the cable to the battery.
- Use the attached power cable on the battery to connect to the Mark 3 AC.

What to expect:
This setup produces up to 600W at 72V under full sunlight, which is the maximum input voltage the Mark 3 Battery's MPPT can safely handle. It offers the highest charging capability among the three solar options, making it suitable for sustained, high-power operation.
With strong and stable sunlight, this system can continuously charge the battery while powering the Mark 3 AC, even in high-consumption modes like Rocket.
For example, in Rocket mode (500W), the setup may deliver 6–8 hours of runtime or continuous daytime operation, depending on sunlight consistency. In lower-power modes like Sleep, the AC can run all day, with excess energy replenishing the battery for use at night.
Note:
• Ensure the total output voltage does not exceed 72V, the MPPT input limit. Going beyond this may damage the battery and cause the AC to malfunction.
• If sunlight is insufficient (e.g., overcast conditions), actual power delivery may drop below AC requirements, causing intermittent operation unless the battery has reserve charge.
• For non-solar charging sources, keep the input within 12V–60V, as exceeding this range may lead to damage or safety issues.
5. Mark 3 Battery with Mark 2 Battery (Pass-Through Charging)
What you need:
- 1 × Mark 3 AC
- 1 × Mark 3 Battery
- 1 × Mark 2 Battery
- 1 × Connection Cable from Mark 2 Battery to Mark 3 Battery
How to connect:
- Connect the Mark 2 Battery to the Mark 3 Battery using the connection cable.
- Use the attached power cable on the Mark 3 battery to connect to the Mark 3 AC.

What to expect:
The Mark 2 Battery (24V) cannot power the AC directly. However, since the Mark 3 Battery accepts 12V–60V DC input, it can be recharged by the Mark 2 Battery while continuing to power the AC via its pass-through function.
This is a practical way to reuse spare Mark 2 batteries to extend runtime. Just note that the Mark 3 Battery must already have some charge. The Mark 2 Battery alone cannot start the AC if the Mark 3 Battery is fully empty.
For example, in Rocket mode (500W), one fully charged Mark 2 Battery combined with a full Mark 3 Battery can power the Mark 3 AC for up to 3.7 hours.
Powering Mark 3 AC Without Mark 3 Batteries
Want to run your Mark 3 AC without dedicated Mark 3 batteries? No problem. This section introduces several reliable alternatives, from wall outlets to external battery banks, so you can stay cool in any setting.
6. Shore Power or Wall Outlet
What you need:
- 1 × Mark 3 AC
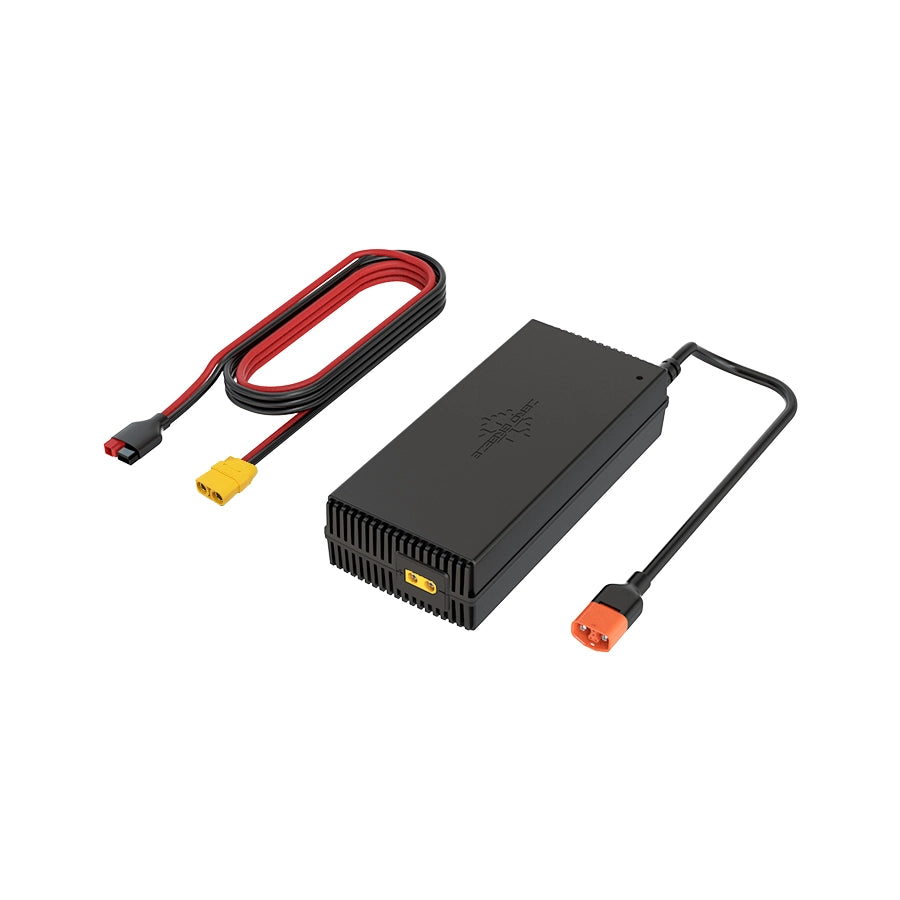
- 1 × Mark 3 Power Adapter
How to connect:
- Connect the power adapter to the Mark 3 AC.
- Plug the adapter into a standard wall outlet or shore power source.

What to expect:
This is the simplest and most stable way to power your Mark 3 AC. As long as you're plugged in, the unit will provide uninterrupted cooling.
7. 12V to 48V Battery Banks
Note:
• Some setups in this section require basic electrical knowledge. If you're unsure, consult a qualified technician before proceeding.
• Energy loss during voltage conversion may affect actual runtime.
• As these systems rely on third-party batteries, we cannot guarantee full compatibility or performance.
Option A: 12V Battery Bank with 48V Booster
What you need:
- 1 × Mark 3 AC
- 1 × 48V Booster
- 1 × XT90 to Eye Terminals Cable
- 1 × 12V Battery Bank
How to connect:
- Connect the 48V Booster to the Mark 3 AC.
- Connect the XT90-to-Eye-Terminal cable to the input side of the booster.
- Attach the other end of the cable securely to your 12V battery bank's output terminals.

What to expect:
Since the Mark 3 AC operates at 48V, a booster is required to raise the 12V input voltage to the appropriate level. Both the booster and cables must be properly rated to meet the AC's power demands. The runtime in this setup depends on your 12V battery bank's capacity and the AC's power mode.
For example, a 12V 100Ah battery bank (about 1200Wh) can power the AC for approximately 2–8 hours, depending on whether it's running at maximum (500W) or minimum (150W) power. A larger 12V 300Ah battery bank (about 3600Wh) can extend the runtime up to 7–24 hours under similar conditions.
Note:
• Do not attempt to power the Mark 3 AC directly from a car's cigarette lighter port. These ports typically provide only 10A (about 120W), which is far below the AC's minimum power requirement (150W). Doing so can lead to startup failure or blown fuses, especially if used with a voltage booster.
• Ensure your 12V battery bank can deliver at least 600W of continuous output to reliably support peak AC operation. The 48V booster typically operates at 85–90% efficiency, so the actual input demand is higher than the Mark 3 AC's output.
• Use cables no thinner than 8 AWG (6 AWG recommended for better safety). Undersized cables may overheat under high current, causing voltage drops or even safety hazards such as melting or fire.
Option B: 24V Battery Bank with 48V Booster
What you need:
- 1 × Mark 3 AC
- 1 × 48V Booster
- 1 × XT90 to Eye Terminals Cable or XT90 to Anderson Terminals Cable (depending on your battery connector)
- 1 × 24V Battery Bank
How to connect:
- Connect the 48V Booster to the Mark 3 AC.
- Attach the appropriate cable to the input side of the booster.
- Connect the other end of the cable to the 24V battery bank.

What to expect:
This configuration allows you to use a 24V battery bank to power the Mark 3 AC via a 48V booster.
For example, a 24V 100Ah battery (about 2400Wh) can power the Mark 3 AC at full 500W output for approximately 4.8 hours. Actual runtime may vary depending on battery health, ambient temperature, and booster efficiency.
Note:
• To support peak AC performance (500W), and factoring in booster efficiency (typically 85%–90%), your 24V battery and cables should be capable of supplying at least 25A of continuous current.
• Some advanced users also use 36V battery banks with suitable 48V boosters and matching cables. While less common than 12V or 24V setups, 36V systems can work reliably if the booster's input voltage range supports them.
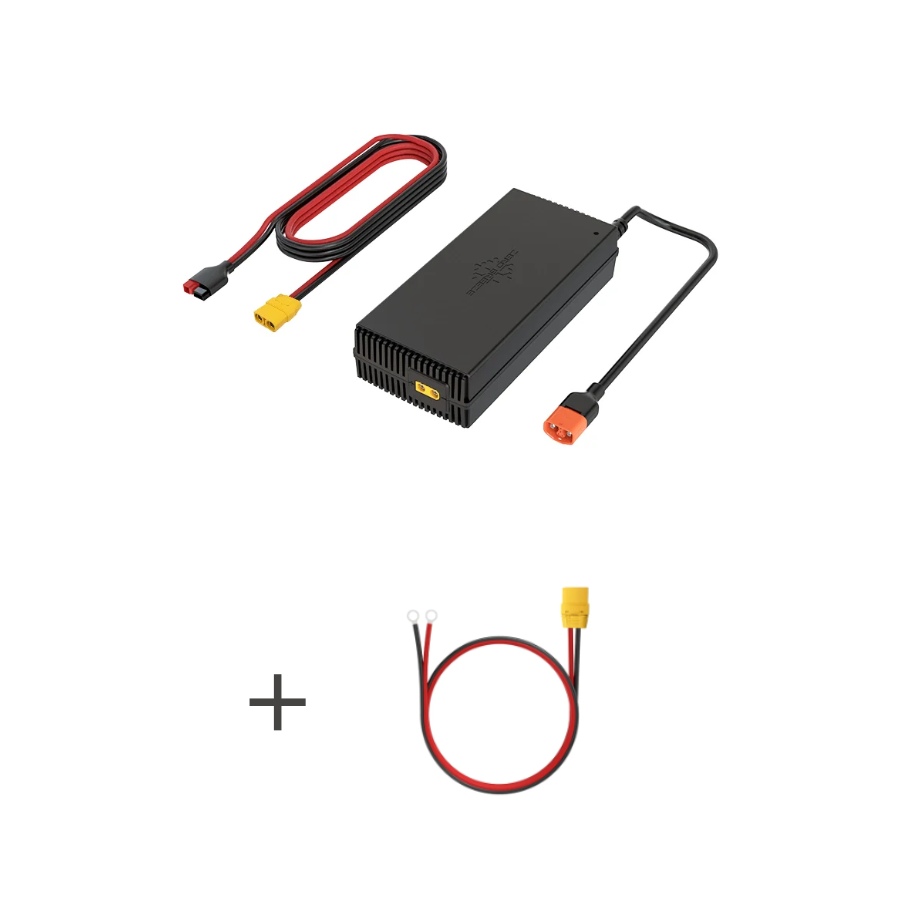
Option C: 48V Battery Bank (Direct Connection)
What you need:
- 1 × Mark 3 AC
- 1 × Mark 3 DIY Cable
- 1 × 48V battery bank
How to connect:
Use the Mark 3 DIY Cable to connect the 48V battery bank directly to the Mark 3 AC.

What to expect:
This is the most efficient battery setup since no voltage conversion is required. The Mark 3 AC can be powered directly from a properly rated 48V battery.
For example, a 48V 50Ah battery bank (about 2400Wh) can run the AC for approximately 4 to 16 hours depending on usage mode.
Note:
• The battery and cables must safely support at least 10A continuous current.
• Ensure the battery can supply at least 600W of output power to support the AC at full load and account for energy loss.
8. Portable Power Stations
Many users may want to use a portable power station to run the Mark 3 AC. As long as your power station has appropriate DC output voltages (e.g., 12V, 24V, or 48V) with sufficient power capacity (≥600W recommended), this method works similarly to using a battery bank.
Since a portable power station essentially functions as an integrated battery system with additional interfaces and protections, you can refer to Section 7 12V to 48V Battery Banks for detailed guidance on connection methods, cable recommendations, and current requirements.
Alternatively, if you plan to use the AC outlet on your portable power station, please refer to Section 6 Shore Power or Wall Outlet for proper setup instructions.
Note:
• Please ensure that the DC output port on your power station can deliver sufficient current. Some 12V DC ports, especially car cigarette lighter sockets, are limited to 10A and are not suitable for powering the Mark 3 AC directly.
If you have any questions about powering your Mark 3 AC, feel free to drop a comment below or contact us at support@zerobreeze.com. We're always here to help.


Leave a comment