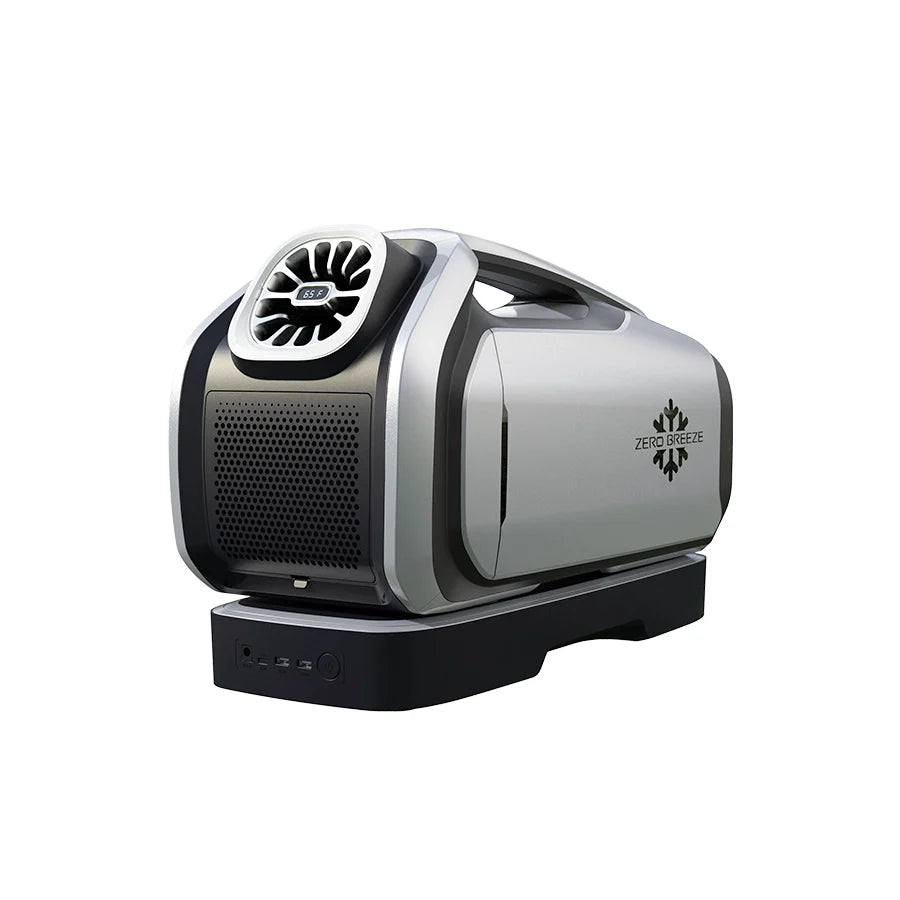
Different Placement Methods and Cooling Effects of Mark 2 AC

When you buy a Mark 2 AC, you may confuse about how to use it to achieve a better cooling effect. The guide may solve your issue with dealing with the problem, combined with its tube connection.
Method 1: Put Mark 2 AC solely inside of the room (No-hose)
The method focuses on the no-hose installation technique of Mark 2 AC. Suppose you are using the Mark 2 AC in a small, insulated space.
Effects: In this type of installation, the air within space is continually circulated and cooled down. Thus, due to the circulation of both cool air and heated air within the small insulated space, the cooling effect is not as effective in lowering the temperature of the area.
Applicable Scenario:
The method is more suitable for situations where cooling the entire space is not necessary, such as open outdoor environments, large rooms, offices, RVs, storage areas, and factories. People can use the AC Mark 2 to blow on them directly.
Tip: To prevent heat buildup generated by the AC, it is advisable to open doors and windows for air convection.

Method 2: Connect a hot exhaust hose and put Mark 2 AC inside of the room
In this method, we will focus on the single hose installation technique. Suppose you are using the Mark 2 AC in a small, insulated space and the rear air exhaust hose is installed to expel hot air.
Effect: In this installation method, the air inside the space is continuously circulated and cooled. And the incoming air for cooling the rear condenser comes from the cool air inside the space. The approach can initially result in faster cooling. However, as the AC operates for an extended period, the amount of air inside space still decreases, creating negative pressure relative to the outside. As a result, the longer the unit operates, the less effective the cooling becomes.

Method 3: Install the dual pipe at the rear of the air conditioner
The method is to install the dual pipe at the rear of the Mark 2 AC and put the Mark 2 AC outside the tent.
Effect: Compared to having only one exhaust hose to the outside, extending the back dual-hose setup does not create negative pressure relative to the outside, as it allows for continuous intake of fresh air, because the intake air used to cool the condenser comes from the outside.
When cooling a space, we recommend this dual-hose installation. As the air inside space will continuously circulate and cool down, this method is more effective in a small insulated space. The longer the system operates, the better the cooling effect will be.

Method 4.1: Connect the front air vent hose and put the AC outside of the tent
Effects: As two air flows circulate in the area, the air temperature will drop but not that fast and cool, and the air temperature inside the area will reach a certain level after having the AC run for a while. Furthermore, the air that enters the front intake to be cooled down is sourced from outside, which tends to be hotter than the air already present inside the area. Consequently, the temperature of the cooled air may not be as cool as desired.
This installation method offers multiple benefits, such as space-saving and reduced noise, by placing the AC unit outside the cooled area. It also ensures proper air circulation. However, as previously mentioned, this installation may not cool the area as quickly or effectively as positioning both the front air intake and vent hose inside the area. Therefore, we recommend this installation approach for insulated areas that require larger spaces but do not necessarily prioritize faster and more efficient cooling.

Method 4.2: Connect Front Air Vent Hose and Front Air Intake Hose and put the AC outside of the tent
Except for rear dual-hose installation, you can also use the front air vent and intake hose to save more space in your setup while running the Mark 2 AC.
Effects: In this installation, the air to be cooled is the air that has already been cooled by the AC. As a result, the temperature inside the area will decrease more rapidly.
This installation method not only ensures proper air circulation but also provides more space and reduces noise in the area being cooled. Therefore, we recommend this installation approach for insulated areas that require larger spaces and prioritize faster and more efficient cooling. However, please note that this method requires the use of both the front air vent hose and the front air intake hose.


Front Air Intake Adapter and Hose Installation
To install the front air inlet duct, you will need:
-
A stiff card or similar object for removing the front air inlet
-
The front air inlet duct adapter (available for purchase on the website [insert link] or through the Zero Breeze Mark 2 community where you can find the 3D printable file)

Step:
-
Carefully insert the stiff card into the gap around the front air inlet. Gently apply pressure to remove the front air inlet.
-
Take the front air inlet duct adapter and align its two clasps with the corresponding ports on the unit. Ensure a secure fit by firmly pushing the adapter into place.
-
Connect the hose - attach one end of the flexible hose to the opening on the front air inlet duct adapter.
-
The other end of the hose can be extended into space, where the inside air will be cooled down after a while.
*Please note that there are two versions of air inlet ducts. The front air inlet duct adapter for Mark 2 on our website can be directly compatible with the V2 version without any trimming required.


Leave a comment