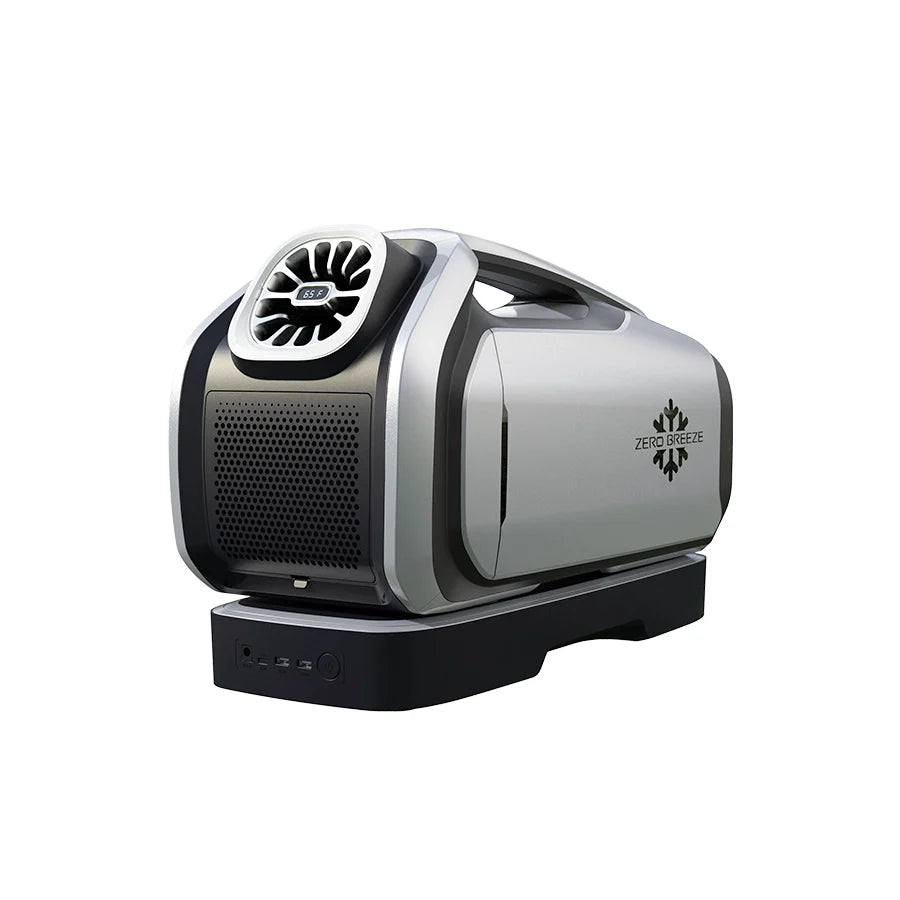
DIY Guide: How to Vent the ZERO BREEZE Mark 3 Through an RV Roof Fan

One of the most common questions we hear, especially from van lifers and RV owners, is:
"Can I vent the heat from my Mark 3 through my roof fan without cutting a new hole in my van?"
The answer is YES. By utilizing your standard RV roof fan, you can create a seamless, removable exhaust setup. This allows you to vent hot air out directly while keeping your vehicle secure.
Here's how to create a simple DIY board to vent your Mark 3, taking the popular MaxxFan Deluxe as an example.
What You'll Need
Before you get started, prepare the following items.
Materials
- PVC foam board (thickness should match the original screen frame)
- ZERO BREEZE exhaust duct adapter with clips and screws (coming soon to our official website)
- Mark 3 rear exhaust duct (with rear outlet adapter connected)
Tools
- Pen or marker
- Utility knife
- Screwdriver
Step-by-Step Installation
Step 1: Remove the screen
Twist the four locking knobs on the MaxxFan Deluxe frame and remove the screen.

Step 2: Trace the screen outline
Place the screen on your PVC foam board and trace the outer edge with your pen.

Step 3: Cut the screen shape
Carefully cut out the outer shape you just traced.

Step 4: Mark the exhaust opening
Use the inner ring of the exhaust duct adapter as a template to mark the hole (⌀150mm). Position it off-center (to one side) of the board, not in the middle, to ensure smooth exhaust airflow through the roof fan.

Step 5: Cut the foam board
Carefully cut out the inner ⌀150mm circle.

Step 6: Attach the duct adapter
Place the duct adapter flat on the surface of the board, covering the opening. Secure it with screws.
Important Installation Tips:
- The adapter must sit entirely on one side of the board. Do not push or insert it into the hole, as it may hit the fan blades, causing malfunction.

- Insert the screws into the four flat holes on the outer ring to ensure a tight, flush fit. Do not use the four raised holes.

Step 7: Connect the exhaust duct
Stretch the free end of the exhaust duct slightly and insert it into the adapter. This ensures the clips can lock the duct securely in place.

Step 8: Lock the duct in place
Line up the raised tab on each locking clip with the matching notch on the adapter, then press it in until you hear a clear "click".

Step 9: Install the board
Place your new board into the fan opening (replacing the screen) and twist the four knobs to lock it in place.

Note: Once the adapter is installed, we recommend leaving it screwed into the board. Removing the screws repeatedly may loosen the holes in the foam. If you need to remove the setup, simply take out the entire board.
You're All Set
Connect the exhaust duct to the Mark 3, then open your roof fan lid. Your Mark 3 is now ready to vent hot air directly outside.
This setup creates a sealed, vertical exhaust path that efficiently vents heat out of the vehicle without compromising your privacy or safety. It's easy to install, easy to remove, and requires no permanent modifications.
Have More Questions?
If you have additional questions about using the ZERO BREEZE Mark 3 portable AC in your RV, van, or other setup, feel free to reach out to us at support@zerobreeze.com.
We're here to help, and we'll take it from there.


Leave a comment